Since discovering my crafty side about 7 years ago, when I picked up my first pair of knitting needles, I've slowly added certain crafts to my repertoire. First I added some simple hand stitching (this mostly being out of necessity as a broke college student), then some crochet, an upgrade to a sewing machine, and now - hand embroidery.
I've been interested in embroidery for as long as I can remember, my grandma has all the little scraps of fabric she gave me covered with the chicken scratch stitches of 8 year old me. Unfortunately, no one in my family does hand embroidery, my grandmother had just let me cut up old clothing and had purchased me embroidery floss and needles to nurture my creativity.
Now I'm back! With the knowledge and faith that I can teach myself, especially if I've successfully taught myself knitting, crochet and sewing.
I've already gone and picked myself up needles, embroidery floss, hoops, and some onesies to learn on (for my niece of course, oh and there's that - my sister is having a girl!).
This is my first finished project:
I freehanded the bird with a template pencil, and went over in running and stem stitch. :) The eye is a French knot, and the beak satin stitch. It was a good learn-to template.
Next:
Embossed tie applique onesie, cupcake toys and rattles, the baby blanket (which is more than half done), and I'm sure an assortment of other projects I'll add to my roster.
Allonsy!
Showing posts with label knitting. Show all posts
Tuesday, February 19, 2013
Saturday, February 9, 2013
Weekend Knitting
My weekend is going by in a sunny, fiber infused blur. I just wanted to share some WIP pics.
I hope everyone else's weekend is well!
Allonsy!
Thursday, January 31, 2013
Duplicate Stitch How-To
I'm back! And this time I'm getting back into the swing of this whole tutorial thing.
I frequently use duplicate stitch in my knitting. I use it to reinforce any seaming I do, and to reinforce thumbs on gloves and mittens, it's also a good alternative for new knitters who are still scared to attempt other colorwork methods, like Fair Isle or intarsia, to put a design on a piece of knitting after it's completed. Duplicate stitch isn't difficult, all you'll need is your project, a tapestry needle, and a similar weight of contrasting yarn. Duplicate stitch, in my experience, only works on stockinette pieces of knitting. When you're looking at stockinette stitch, you'll see that the individual stitches look like little tiny "v's."
You'll need a contrasting yarn, or the same color of yarn if you're reinforcing a seam or area of your knitting. It's important that the two yarns are the same weight, otherwise the constrasting yarn will bulge, or it won't cover the underlying stitches completely. If you don't have two yarns of the same brand or weight, you can substitute certain yarns. For example, if you're working with worsted weight yarn, you can use a double strand of DK yarn to duplicate stitch.
I frequently use duplicate stitch in my knitting. I use it to reinforce any seaming I do, and to reinforce thumbs on gloves and mittens, it's also a good alternative for new knitters who are still scared to attempt other colorwork methods, like Fair Isle or intarsia, to put a design on a piece of knitting after it's completed. Duplicate stitch isn't difficult, all you'll need is your project, a tapestry needle, and a similar weight of contrasting yarn. Duplicate stitch, in my experience, only works on stockinette pieces of knitting. When you're looking at stockinette stitch, you'll see that the individual stitches look like little tiny "v's."
You'll need a contrasting yarn, or the same color of yarn if you're reinforcing a seam or area of your knitting. It's important that the two yarns are the same weight, otherwise the constrasting yarn will bulge, or it won't cover the underlying stitches completely. If you don't have two yarns of the same brand or weight, you can substitute certain yarns. For example, if you're working with worsted weight yarn, you can use a double strand of DK yarn to duplicate stitch.
1. Thread a tapestry needle with contrasting yarn. (Don't thread too much onto the needle, it's better to have a few more tails to weave in when finished than pulling feet and feet of yarn through your work, and having a tangled mess on the wrong side of the fabric.) Insert the needle into the base of a stitch, right where the two legs meet at the bottom of the "v." Pull the yarn through, leaving a 6 inch or so long tail.
2. Now insert your tapestry needle into both legs of the stitch above the stitch you originally pulled your constrasting yarn through. Pull the yarn through the two legs, but not too tightly. Just as with knitting, you'll find a tension that works for you with practice of this technique, like Ma' always said "Practice makes perfect." And something about patience, what was that again?
3. Re-insert your needle right back into the base of the stitch that you originally started in, and now you'll see how the contrasting yarn rests right over the two legs of the stitch, effectively masking the original color. I like to think of it like I'm drawing an upside down triangle over the stitch, using the legs of the stitch about it.
In the end, you should have something that looks like the picture above, neat little duplicate stitches square over your original work. Experiment with this technique to create beautiful motifs, or finished objects that will withstand the forces of nature.
As always, if you have any questions, would like a PDF version of this tutorial, or have any requests you can contact me at Ashley.Mishmoshcrafting@gmail.com
Allonsy!
Tuesday, January 29, 2013
My Experiences with Knit Picks
What I love most about Knit Picks is their customer service. I've never bought from a company with such prompt, polite and understanding individuals on the other end of my customer service calls. In the past I've purchased many cables, needles, yarns and accessories from Knit Picks (and will continue to do so), although I have only ever had an issue three times - it was always handled without question. And without me having to send back an item, fill out some form, or sacrifice my first born.
My first experience with their customer service was 2 years ago - a giddy me had purchased the Harmony Interchangeable needle set. I got my set, was in love, and didn't pay attention to the cap on one of the cables, and it stripped the connection on my size 5 tips. I was sad. Very sad. My husband said "Well, try calling them." So, on a whim, I did. The kind woman who picked up said "Okay, well I'll get a new 32" cable and set of size 5 needles right out to you!" Since my first issue I've only had to call customer service twice more, but both times they handled my issues quickly and kindly, with no hassle on my end. It was this interaction, and confidence in who I was buying from, that has brought me back time and time again.
I've gone into yarn shops after buying a product the day before (realizing I grabbed what I thought were yarns from the same dye lot but were not, circulars with faulty connections, etc), and they wouldn't take returns. Or they told me to contact the manufacturer, who told me to contact the store, and it was a big run around. I'm still going to go to my LYS for yarns that I need right now, or that Knit Picks doesn't carry, but for the things I can wait a few days for - I'm a KP customer all the way.
Note: I am in no way affiliated with Knit Picks, other than being a pleased customer. This post isn't an advertising ploy, and it's not lining my knitting basket with yarn.
Saturday, January 26, 2013
Finished Object: Diamond Baby Socks
I finished the diamond baby socks for my sister last night! It was a great victory, for, as I mentioned, I found the pattern to be a little "figure it out yourself!" And found myself frogging back a lot because my diamond pattern just wasn't lining up. Now they're done, and perfect! I knit them out of Knit Picks Stroll sock yarn, and I'm going to be casting on some matching mittens soon, and I can't wait to see the set on my little niece (or nephew, but I'm hoping for a niece. But of course, I'm happy no matter what - just want a healthy baby for my little sister.)
Now I just have to finish the hooded froggie baby towel for her, and then start another 20 projects. I have lots of hats I want to make, but I'm trying to stay away from anything gender specific until she knows what she will be expecting.
Until next time!
Allonsy
Until next time!
Allonsy
Tuesday, October 9, 2012
WIP (A Noble Cowl)
My last posting showed you guys how to dye yarn with food coloring, as a frugal, non-toxic alternative to harsher yarn dyes. I've been knitting up a cowl with that yarn, and so far I'm in love with the color spread.
This is a pattern I've done several times, it's a wonderful, flowing and derived from a classic lace motif. A Noble Cowl [ravelry] is a pattern I'd recommend to anyone wanting to start progressing into lace work, the repeats are easy to flow with and memorize.
I think this time I'll be keeping this project for myself.
Saturday, September 22, 2012
Christmas FO #1
My first Christmas knitting project is complete!
I know it's simple, but I also think it's very chic in it's very own way. And hopefully my little sister will agree.
Pattern located here: http://www.purlbee.com/the-purl-bee/2011/10/11/sweet-stitching-with-erin-bandana-cowl.html
All credit for the pattern to The Purl Bee. I found this pattern via Ravelry.
For those who don't know about the forum visit: Knitting Paradise
I know it's simple, but I also think it's very chic in it's very own way. And hopefully my little sister will agree.
Pattern located here: http://www.purlbee.com/the-purl-bee/2011/10/11/sweet-stitching-with-erin-bandana-cowl.html
All credit for the pattern to The Purl Bee. I found this pattern via Ravelry.
For those who don't know about the forum visit: Knitting Paradise
Tuesday, September 18, 2012
Twisted Stitches
Using cables in knitting is an easy way to incorporate both feminine and masculine touches to a project. Using a Celtic knot can make a pair of mittens interesting and strong for your special man friend, and just a braid can make a hat pretty and beloved by a mother or sister. In this tutorial, I'll be showing you how to cable without having to use a cable needle.
Before we get started, I'd like to cover a few basics about this technique. For one, it's not my favorite way to cable, but when you've left the house with your project, find yourself with time to kill, and then realize you didn't bring your cable needle along this technique can be a real life saver. There are drawbacks, however. My rule of thumb for using this technique is simple - if I'm doing more than a 6 stitch cable, meaning if I'm actively cabling any more than 3 stitches, I won't use it. The work gets too tight, and it's much too easy to lose those stitches and unravel hours of work - which doesn't save anyone any time. But when used over a small number of stitches, it can help speed you up by taking out the repetition of picking up and putting down your cable needle.
Left Cable (Often LCT, LCB, or C(#St)B)
A left cable twist is a cable that will point, or go off to, the left side of your work when the right side of your work is facing you. To create a left cable twist, the cabled stitches will be held to the back of your work.
Right Cable (Often RCT, RCF, or C(#St)F)
A right cable twist, on the other hand, will go off to the right side of your work. To create a right cable, the cabled stitches will be held to the front of your work.
And that's it! It's really that simple. Usually cabling is done with a cable needle, or just a double pointed needle, where you'll slip the stitches onto the cable needle, hold them in their respective place while you knit the stationary stitches, and then knitting off of the cable needle. This makes it easy to not lose track of stitches, or have them come unraveled. Cabling without a needle is a little (or a lot) more daring, but if your cable pattern is a simple braid, like the example above, or is a cable pattern worked over a small amount of stitches, I think you'll be just fine.
Left Cable Without a Cable Needle:
1. Work up to the stitches that would normally be cabled. Now, skip the normally cabled stitches (in my case it is the first two stitches of the stockinette panel) to the next two (again, this in my case, your pattern may be worked over three, or more stitches). Insert your right hand needle into the back of these stitches.
2. Here's where it gets scary. Mentally steel yourself, my friend, it will all be alright. Deep breath in, deep breath out.
Now you're going to slide the preceding stitches (the 2 that would normally be slipped onto a cable needle) off the left hand needle, and slip the two stitches you just went into the back of onto your right hand needle. (Do this slowly, don't jerk your knitting around, and you shouldn't have any problems.)
Taking your left hand needle, scoop those free stitches up. Again, do it slowly. Going fast is instinct, but if you jerk too much you're bound to have those free stitches unravel at some point.
Before we get started, I'd like to cover a few basics about this technique. For one, it's not my favorite way to cable, but when you've left the house with your project, find yourself with time to kill, and then realize you didn't bring your cable needle along this technique can be a real life saver. There are drawbacks, however. My rule of thumb for using this technique is simple - if I'm doing more than a 6 stitch cable, meaning if I'm actively cabling any more than 3 stitches, I won't use it. The work gets too tight, and it's much too easy to lose those stitches and unravel hours of work - which doesn't save anyone any time. But when used over a small number of stitches, it can help speed you up by taking out the repetition of picking up and putting down your cable needle.
Left Cable (Often LCT, LCB, or C(#St)B)
A left cable twist is a cable that will point, or go off to, the left side of your work when the right side of your work is facing you. To create a left cable twist, the cabled stitches will be held to the back of your work.
Right Cable (Often RCT, RCF, or C(#St)F)
A right cable twist, on the other hand, will go off to the right side of your work. To create a right cable, the cabled stitches will be held to the front of your work.
And that's it! It's really that simple. Usually cabling is done with a cable needle, or just a double pointed needle, where you'll slip the stitches onto the cable needle, hold them in their respective place while you knit the stationary stitches, and then knitting off of the cable needle. This makes it easy to not lose track of stitches, or have them come unraveled. Cabling without a needle is a little (or a lot) more daring, but if your cable pattern is a simple braid, like the example above, or is a cable pattern worked over a small amount of stitches, I think you'll be just fine.
Left Cable Without a Cable Needle:
1. Work up to the stitches that would normally be cabled. Now, skip the normally cabled stitches (in my case it is the first two stitches of the stockinette panel) to the next two (again, this in my case, your pattern may be worked over three, or more stitches). Insert your right hand needle into the back of these stitches.
2. Here's where it gets scary. Mentally steel yourself, my friend, it will all be alright. Deep breath in, deep breath out.
Now you're going to slide the preceding stitches (the 2 that would normally be slipped onto a cable needle) off the left hand needle, and slip the two stitches you just went into the back of onto your right hand needle. (Do this slowly, don't jerk your knitting around, and you shouldn't have any problems.)
Taking your left hand needle, scoop those free stitches up. Again, do it slowly. Going fast is instinct, but if you jerk too much you're bound to have those free stitches unravel at some point.
Now you're going to pull the 2 stitches your transferred to your right hand needle up and slip them back onto the left hand needle, in front of the two previously free stitches. (I kinda messed up and didn't get a picture of that, sorry!) Now all you have to do is knit across the now cabled stitches. Easy peasy. Essentially all we did was rearrange the stitches on the needles themselves, instead of doing it with the help of the cable needle.
Right Cable Without a Cable Needle:
Now we'll move on to the right cable steps. A right slanting cable calls for the stitches to be held behind the work. As you can imagine, we'll be reversing the directions above. Again work up to the stitches you'd normally slip onto the cable needle, skip those stitches and insert your needle into the front of the two stitches (or whatever your pattern specifies) after.
Just as before, slide the stitches to the tip of your left hand needle, letting the first two stitches fall free, and pulling the stitches you went into off the left hand needle, and on to the right hand needle. Using your left hand needle, pick up the free stitches. Then slip the two stitches transferred to your right needle back to the left hand needle.
And then all you do is knit along as normal!
We're done! That's how you cable sans the actual cable needle. As always, if you have any questions feel free to comment, email, smoke signal, or telegram! But the first two really are ideal.
If a video would work better for you, I have found the couple listed below helpful.
Allonsy!
Monday, September 17, 2012
And It Begins
I got a new laptop! It's nothing too fancy, but it will do the job for the time being (I plan on updating all the fancy stuff once the PCS is handled.) I'm ecstatic to be back in action, and I'm itching to pump out some patterns and new knitting and crochet postings.
The season for Christmas knitting is upon us, fellow knitters! I've been feverishly clicking through the pages of Ravelry (the last few weeks on my phone) trying to find the perfect patterns that are perfect for the special people in my life. Men, of course, are always the hardest recipients to knit for (What do they want? Scarves? Hats? Gloves? Remote control snuggies?!) My husband actually made it easy for me this year, with direct requests. But I still have a brother and father to scour the lost annexes of knitting on the internet to please.
I could also buy them more traditional gifts, but what's the fun in that?
Here are some links to a few of my Christmas knitting projects, and some of my all time, go to favorites.
Bella's Mittens - I've got to be honest here, I've never seen the Twilight movies, nor read the books. But I fell in love with the look of these mittens. A couple of my gift list friends will get these, in different colors, obviously. They're a relatively quick knit, and I found that cabling these without a cable needle wasn't too tight. (Post to come on that!)
Katherine Hat - I just finished one of these for my very own mother. The cabling ends up costing your more in yarn than average hats, but the finished piece is just gorgeous.
Shroom - With a nice bulky yarn, this hat is ideal for that quick project, especially for someone who falls into that younger category, and may not be too fond of intricate fair isle, or cabling work.
Skyrim Dragon Mittens - These are by no means a quick knit, and I wouldn't recommend them to a new knitter. But gosh darnit, they're a beautiful finished piece and they will ensure that the gamer in your life will be your best friend forever.
What is your go to Christmas knitting gift? A hat? Maybe a nice set of mittens? Share the patterns to help ease the worries of the rest of us!
The season for Christmas knitting is upon us, fellow knitters! I've been feverishly clicking through the pages of Ravelry (the last few weeks on my phone) trying to find the perfect patterns that are perfect for the special people in my life. Men, of course, are always the hardest recipients to knit for (What do they want? Scarves? Hats? Gloves? Remote control snuggies?!) My husband actually made it easy for me this year, with direct requests. But I still have a brother and father to scour the lost annexes of knitting on the internet to please.
I could also buy them more traditional gifts, but what's the fun in that?
Here are some links to a few of my Christmas knitting projects, and some of my all time, go to favorites.
Bella's Mittens - I've got to be honest here, I've never seen the Twilight movies, nor read the books. But I fell in love with the look of these mittens. A couple of my gift list friends will get these, in different colors, obviously. They're a relatively quick knit, and I found that cabling these without a cable needle wasn't too tight. (Post to come on that!)
Katherine Hat - I just finished one of these for my very own mother. The cabling ends up costing your more in yarn than average hats, but the finished piece is just gorgeous.
Shroom - With a nice bulky yarn, this hat is ideal for that quick project, especially for someone who falls into that younger category, and may not be too fond of intricate fair isle, or cabling work.
Skyrim Dragon Mittens - These are by no means a quick knit, and I wouldn't recommend them to a new knitter. But gosh darnit, they're a beautiful finished piece and they will ensure that the gamer in your life will be your best friend forever.
What is your go to Christmas knitting gift? A hat? Maybe a nice set of mittens? Share the patterns to help ease the worries of the rest of us!
Thursday, June 14, 2012
Entrelac Revisited
A while ago I did a tutorial on entrelac, a great way to knit a modular-type of garment with blocks of alternating colors. Now I decided it was time to do a tutorial on entrelac in the round.When working entrelac in the round you're basically just excluding the side triangle, which may be a godsend for some. Entrelac is definitely easier when worked in the round. But, I recommend everyone learn entrelac flat first.
It might seem counter intuitive, but when you learn how to knit entrelac flat, and then learn it in the round it will just feel like doing it a little differently. If you learn in the round first, and then decide you also want to learn how to work it flat, it will feel totally alien and be extremely confusing.
Materials: I'm using US size 8 Takumi Clover needles, with a 12 inch cable. The size of you needle and cable really depends on your yarn, and the pattern. My yarn is a cream and light pink color of Berella's "4" yarn.
Step 1: Cast on a multiple of 8 stitches to fill up your needle. The blocks and base triangles we'll be working, just like my flat tutorial, will be worked over 8 stitches. It provides a nice even number that's not too large, but not so small that the slipped stitch edges are hard to identify.
We're going to be working the base triangles identically to how you work the base triangles in a flat piece of entrelac. If you're working on an entrelac hat, you will probably have done a set number of ribbed rounds or something similar. I'm just picking up and just knitting the entrelac.
Step 2: Building the Base Triangles
1. Knit 1 stitch
2. Turn your work around, and purl the stitch you just knit.
Note: Some patterns and instructions on entrelac will slip the first stitch of each row, including this very first stitch. I personally do not do this because I've found that knitting the first stitch provides a more "stable" triangle for me, after knitting it once I slip purlwise for the rest of the triangle. If you want to slip this stitch and then purl, that's fine too.
3. Turn work. Slip 1 stitch, knit 1 stitch.
4. Turn work, purl back to start. (By start, I mean back to the start of this base triangle, or, in other words, back to the first original stitch that you're slipping.)
5. Turn work, slip 1 stitch, knit 2 stitches.
6. Turn work, purl back to start.
7. Turn work, slip 1 stitch, knit 3 stitches.
8. Turn work, purl back to start.
9. Turn work, slip 1 stitch, knit 4 stitches.
Continue in this way, adding 1 more stitch of the set 8 every time you turn to knit. Once you have 8 stitches on the right hand needle, you will stop. Do not turn and purl.
You're now done with that base triangle, and you will just pretend for the time being that it doesn't exist anymore. Begin the next triangle on the next set of 8 stitches in the same way as above.
It might seem counter intuitive, but when you learn how to knit entrelac flat, and then learn it in the round it will just feel like doing it a little differently. If you learn in the round first, and then decide you also want to learn how to work it flat, it will feel totally alien and be extremely confusing.
Materials: I'm using US size 8 Takumi Clover needles, with a 12 inch cable. The size of you needle and cable really depends on your yarn, and the pattern. My yarn is a cream and light pink color of Berella's "4" yarn.
Step 1: Cast on a multiple of 8 stitches to fill up your needle. The blocks and base triangles we'll be working, just like my flat tutorial, will be worked over 8 stitches. It provides a nice even number that's not too large, but not so small that the slipped stitch edges are hard to identify.
We're going to be working the base triangles identically to how you work the base triangles in a flat piece of entrelac. If you're working on an entrelac hat, you will probably have done a set number of ribbed rounds or something similar. I'm just picking up and just knitting the entrelac.
1. Knit 1 stitch
2. Turn your work around, and purl the stitch you just knit.
Note: Some patterns and instructions on entrelac will slip the first stitch of each row, including this very first stitch. I personally do not do this because I've found that knitting the first stitch provides a more "stable" triangle for me, after knitting it once I slip purlwise for the rest of the triangle. If you want to slip this stitch and then purl, that's fine too.
3. Turn work. Slip 1 stitch, knit 1 stitch.
4. Turn work, purl back to start. (By start, I mean back to the start of this base triangle, or, in other words, back to the first original stitch that you're slipping.)
5. Turn work, slip 1 stitch, knit 2 stitches.
6. Turn work, purl back to start.
7. Turn work, slip 1 stitch, knit 3 stitches.
8. Turn work, purl back to start.
9. Turn work, slip 1 stitch, knit 4 stitches.
Continue in this way, adding 1 more stitch of the set 8 every time you turn to knit. Once you have 8 stitches on the right hand needle, you will stop. Do not turn and purl.
You're now done with that base triangle, and you will just pretend for the time being that it doesn't exist anymore. Begin the next triangle on the next set of 8 stitches in the same way as above.
Continue your way around the needle, picking up the 8 stitches of each base triangle.
Step 2: The Right Slanting Diamonds
Like I said, there are no side triangles in entrelac worked in the round! Yay! We just get to move on to the central diamonds.
This first diamond might throw you off, it's a rebel without a cause, and it wants to be different than all the other diamonds, it wants to be special. The first diamond will be picked up with the right side facing you. All the other diamonds will be picked up with the wrong side facing you, and there's a special maneuver to begin the other diamonds as well, but we'll worry about that later.
Because you've been slipping the first stitch purlwise, you should have a very neat little edge of "v's" to pick up from.
As I said, you'll be picking up from the front for this diamond. Insert the right hand needle into the "v" at the base of the last triangle (the one you just finished knitting), with alternating color behind, loop and pull the new white stitch onto the left hand needle. Continue this way, picking up a total of 8 stitches. Now it's time to begin forming the first diamond.
Row 1: Purl 7, purl the last white stitch, p2tog (1 white and 1 pink) together
Row 2: Turn and knit across the 8 stitches.
Row 3: Turn, slip 1 stitch, purl 6, p2tog
Row 4: Turn and a knit 8.
You'll keep working this way until the pink stitches (or whatever color you're using) are decreased away. Once you have purled the final pink stitch with the white stitch, you will stop. Don't knit back across. It's time to pick up 8 new stitches.
This time, and for all the rest of the diamonds this round, you'll be picking up with the wrong side facing you.
To begin, yarn back and insert you right hand needle into the first slipped stitch and pull yarn through. (If you're having trouble, this is shown on my original entrelac tutorial, located here: Entrelac Part 1 and Entrelac Part 2) Pick up a total of 8 stitches.
Now bring your yarn back to the front, and slip the last white stitch you just picked up onto your left hand needle, and purl it together with the first pink stitch.
Row 1: Turn, knit 8 stitches.
Row 2: Turn, purl 7, p2tog.
Row 3: Turn, knit 8 stitches.
Row 4: Turn, purl 7, p2tog.
Just as before, continue this until all your pink stitches are gone, on the last p2tog do not turn and knit, just pick up 8 more stitches and do it all again.
At this point it looks like you have an awkward, mushy crown on your needles. Now we're basically going to be filling the little loops formed between each of the triangles with the right slanting diamonds.
Like I said, there are no side triangles in entrelac worked in the round! Yay! We just get to move on to the central diamonds.
This first diamond might throw you off, it's a rebel without a cause, and it wants to be different than all the other diamonds, it wants to be special. The first diamond will be picked up with the right side facing you. All the other diamonds will be picked up with the wrong side facing you, and there's a special maneuver to begin the other diamonds as well, but we'll worry about that later.
Because you've been slipping the first stitch purlwise, you should have a very neat little edge of "v's" to pick up from.
You'll be inserting your needles between each of the "legs" of this v, and picking up a new stitch with your alternating color. In this case, that's white.
Row 1: Purl 7, purl the last white stitch, p2tog (1 white and 1 pink) together
Row 2: Turn and knit across the 8 stitches.
Row 3: Turn, slip 1 stitch, purl 6, p2tog
Row 4: Turn and a knit 8.
You'll keep working this way until the pink stitches (or whatever color you're using) are decreased away. Once you have purled the final pink stitch with the white stitch, you will stop. Don't knit back across. It's time to pick up 8 new stitches.
This time, and for all the rest of the diamonds this round, you'll be picking up with the wrong side facing you.
To begin, yarn back and insert you right hand needle into the first slipped stitch and pull yarn through. (If you're having trouble, this is shown on my original entrelac tutorial, located here: Entrelac Part 1 and Entrelac Part 2) Pick up a total of 8 stitches.
Now bring your yarn back to the front, and slip the last white stitch you just picked up onto your left hand needle, and purl it together with the first pink stitch.
Row 1: Turn, knit 8 stitches.
Row 2: Turn, purl 7, p2tog.
Row 3: Turn, knit 8 stitches.
Row 4: Turn, purl 7, p2tog.
Just as before, continue this until all your pink stitches are gone, on the last p2tog do not turn and knit, just pick up 8 more stitches and do it all again.
That's it for now, folks! The rest of the tutorial, for the left slanting diamonds and the ending triangles should be in tomorrow! If you have any questions, email me at Ashley.mishmoshcrafting@gmail.com
Also - if you like my tutorials, maybe you'd like to donate a dollar (or more!) for my little yarn fund (which doubles as my Addi needles fund, sigh, maybe someday), which of course will be used for more tutorials! Donate Here.
No pressure of course, everything here will remain free.
Edit: I would like to put a very special thank you out to Kay Green for being my first donation. I really appreciate it, thank you for the very special night.
Friday, June 8, 2012
Pulling the Wool Over My Eyes
And my feet, and lap...
I'm tackling my first blanket. I've shied away from blankets because of the time commitment they require. I typically want that instant gratification of a project off my needles by the end of a week. I'm using the extended version of the Radiating Star Blanket available for free on Ravelry.
I'm only in the first 20 rounds, and I love that it's worked in the round, that in itself makes me more likely to finish it. That, and the fact that I got 6 balls of the same color for less than 10 dollars.
This is all I have done so far. But I can't wait to see it lovingly draped across the edge of my chaise lounge.
Have you knitted a blanket? How was it, and did you finish it?
I'm tackling my first blanket. I've shied away from blankets because of the time commitment they require. I typically want that instant gratification of a project off my needles by the end of a week. I'm using the extended version of the Radiating Star Blanket available for free on Ravelry.
I'm only in the first 20 rounds, and I love that it's worked in the round, that in itself makes me more likely to finish it. That, and the fact that I got 6 balls of the same color for less than 10 dollars.
This is all I have done so far. But I can't wait to see it lovingly draped across the edge of my chaise lounge.
Have you knitted a blanket? How was it, and did you finish it?
Monday, June 4, 2012
On the Next Episode
Since Alex and I have been a little more busy these last few days or so (well, I've been more busy than usual, Alex somehow juggles a hectic life 24/7) I guess we've taken to posting blog teasers. I wanted to give a little preview of what I'm planning for the next week, provided I learn to juggle this blog, my other blog, and my writing work.
I was cruising through Pinterest searching for inspiration for my next project when I saw this.
I love big, bold socks like this. Sure, the only place to conveniently wear them is at home, but isn't that where they're the most comfortable anyway?
I couldn't find a pattern for this picture, so I'm putting together my own sock tutorial (complete with video!) and pattern, both will be available for free. The tutorial will cover an afterthought heel and a star toe.
So, stay tuned!
I was cruising through Pinterest searching for inspiration for my next project when I saw this.
I love big, bold socks like this. Sure, the only place to conveniently wear them is at home, but isn't that where they're the most comfortable anyway?
I couldn't find a pattern for this picture, so I'm putting together my own sock tutorial (complete with video!) and pattern, both will be available for free. The tutorial will cover an afterthought heel and a star toe.
So, stay tuned!
Wednesday, May 30, 2012
Absence Makes the Heart Grow Fonder, Right?
Have I really been gone for over a week?!
Sorry guys, life has been busy. With a military husband to spoil over Memorial Day weekend I had my hands full.
But I do have good news - my knitting mojo has returned! What a glorious thing it is. I'm currently working on a version of Pumpkinbelle's cowl, located here: http://pumpkinbelleknitsandbits.blogspot.com/2011/05/grey-loop.html
I'm switching it up a little bit, and I'll be sure to share my changes with you. I'm also working on some patterns of my very own, like a hat, and.. well, mostly hats. I love lacey head-wear this time of year.
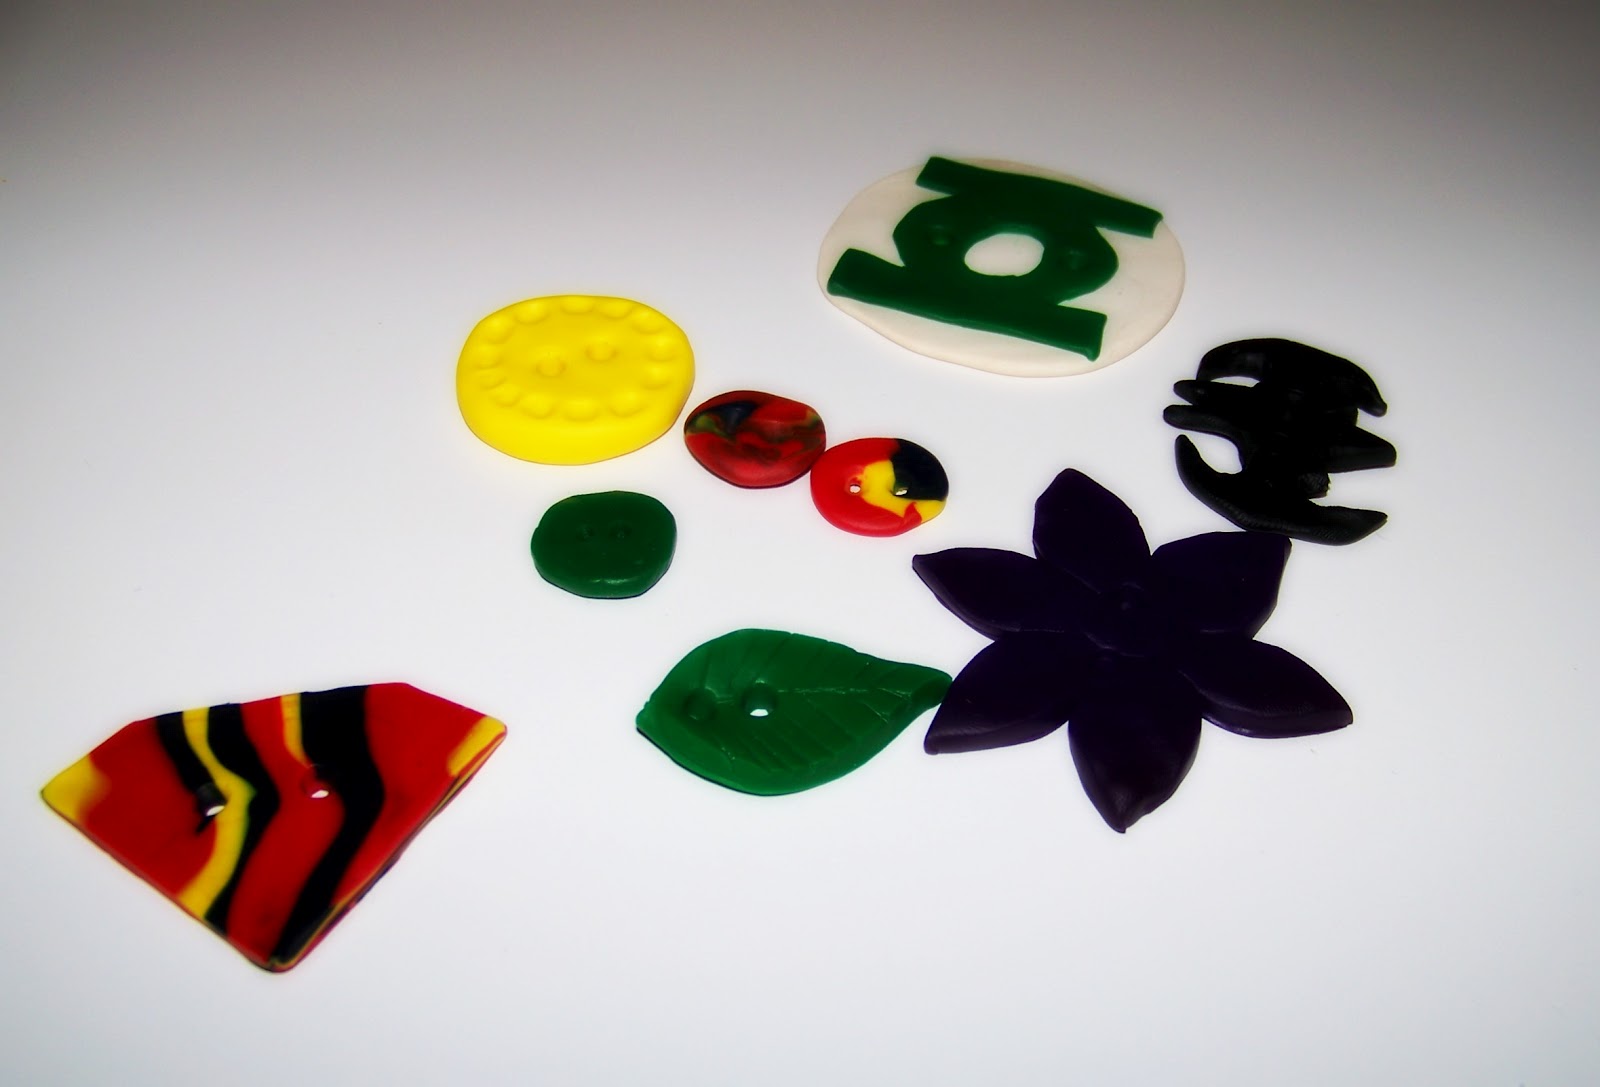
I did accomplish one goal I've been putting off this weekend - working with polymer clay.
How was everyone's long weekend? How do you dress your knitting up?
Sorry guys, life has been busy. With a military husband to spoil over Memorial Day weekend I had my hands full.
But I do have good news - my knitting mojo has returned! What a glorious thing it is. I'm currently working on a version of Pumpkinbelle's cowl, located here: http://pumpkinbelleknitsandbits.blogspot.com/2011/05/grey-loop.html
I'm switching it up a little bit, and I'll be sure to share my changes with you. I'm also working on some patterns of my very own, like a hat, and.. well, mostly hats. I love lacey head-wear this time of year.
I did accomplish one goal I've been putting off this weekend - working with polymer clay.
I mostly wanted to get into working with polymer clay to make buttons for my knitting. And that's exactly what these lil' beauties will be used for. I even got my husband to help make them with me, and while we're not professionals yet, I think we did pretty alright for a couple of first timers.
How was everyone's long weekend? How do you dress your knitting up?
Sunday, May 20, 2012
Knitter's Block
Anyone who knits for a period of time understands the frustration of Knitter's Block. You search through pages and pages of Ravelry pictures, hoping for one of the thumbnails to jump out at you, inspire you, and launch you into a fury of needles and yarn - ending with a final beautiful project. But this doesn't happen. You cease to be inspired. You feel as if your mojo has abandoned you. Your needles lay dormant, your stashed untouched. The world is cold, and lonely, devoid of the warmth of your 100% baby alpaca lace weight sock yarn.
Maybe that last part is an exaggeration.
Regardless, this is where I am with my knitting at the moment. I was incredibly inspired by the thoughts of recycling everyday items that no longer had a use into yarn, and making wonderful home decor with them, ie the t-shirt pillow and the sheet bowl. Once I completed these projects, I just failed to have anything jump out at me and inspire me. It might be the changing seasons, it's hard to justify knitting scarves and hats in the middle of a 105 degree Las Vegas summer, or it's just a plain lack of motivation.
I keep starting projects. Having hope for them, and then ripping them from my needles, and tossing the yarn back into the ol' stash bin. So, I started doing the thing that typically remedies these moments for me - knitting dish cloths. I posted about this awhile back, and linked to a pattern I really like: Instant Knit-ification
At the moment, this is exactly what I've been knitting this week. Wash cloths. So many cloths. I purchased a large cone of cotton yarn, aptly named "Ivy League," by Peaches n' Cream. I actually settled on the yarn, because the other cones available were all bubblegum pink, or a crazy purple color. My kitchen has a lot of blue and greens, so it worked. Now I'm really in love with the yarn, and I enjoy how the greens and blues snake across the knitting, reminiscent of ivy.
The pattern for the finished cloth shown on the corner of my wash cloth bin is located here: Modified Feathers and Fan Cloth. The original pattern, from Dishcloth Boutique, is here: Feathers and Fan Cloth, I followed this pattern for the cloth shown in the Ivy League yarn.
I also stumbled upon this pattern, thanks to Ravelry, Picot Swirl Cloth, which I love. I always had an affinity for round cloths, and thought the only way to really make one was to crochet. Boy, am I glad I was wrong. At first glance, the pattern seems intimidating - but it's really not, just give it a chance. Also, when stitching it up at the end, don't try using Kitchener stitch, you'll want to use the shoulder seam technique. There are directions for this seam here: Shoulder Seam Instructions.
How do you guys pass the time when you hit your own knitter's block? Is there a go-to garment you whip up?
Maybe that last part is an exaggeration.
Regardless, this is where I am with my knitting at the moment. I was incredibly inspired by the thoughts of recycling everyday items that no longer had a use into yarn, and making wonderful home decor with them, ie the t-shirt pillow and the sheet bowl. Once I completed these projects, I just failed to have anything jump out at me and inspire me. It might be the changing seasons, it's hard to justify knitting scarves and hats in the middle of a 105 degree Las Vegas summer, or it's just a plain lack of motivation.
I keep starting projects. Having hope for them, and then ripping them from my needles, and tossing the yarn back into the ol' stash bin. So, I started doing the thing that typically remedies these moments for me - knitting dish cloths. I posted about this awhile back, and linked to a pattern I really like: Instant Knit-ification
At the moment, this is exactly what I've been knitting this week. Wash cloths. So many cloths. I purchased a large cone of cotton yarn, aptly named "Ivy League," by Peaches n' Cream. I actually settled on the yarn, because the other cones available were all bubblegum pink, or a crazy purple color. My kitchen has a lot of blue and greens, so it worked. Now I'm really in love with the yarn, and I enjoy how the greens and blues snake across the knitting, reminiscent of ivy.
The pattern for the finished cloth shown on the corner of my wash cloth bin is located here: Modified Feathers and Fan Cloth. The original pattern, from Dishcloth Boutique, is here: Feathers and Fan Cloth, I followed this pattern for the cloth shown in the Ivy League yarn.
I also stumbled upon this pattern, thanks to Ravelry, Picot Swirl Cloth, which I love. I always had an affinity for round cloths, and thought the only way to really make one was to crochet. Boy, am I glad I was wrong. At first glance, the pattern seems intimidating - but it's really not, just give it a chance. Also, when stitching it up at the end, don't try using Kitchener stitch, you'll want to use the shoulder seam technique. There are directions for this seam here: Shoulder Seam Instructions.
How do you guys pass the time when you hit your own knitter's block? Is there a go-to garment you whip up?
Friday, April 20, 2012
Knitting In The Round: Double Pointed Needles
Knitting in the round is a technique that often scares new knitters, or even seasoned knitters who have just avoided doing it. But knitting in the round is much easier than it appears, and it's a lot of fun when you get the hang of it. One of the best perks of knitting in the round is - get this - no purling to create perfect stockinette stitch. Purling of course can be used to change texture, and just add a border other than stockinette.
Knitting in the round is definitely intimidating at first, but if you just follow along below, take breathers and make sure not to get ahead of yourself, or expect perfection on your first go at it, you'll be fine. :) I promise.
Now, there are two popular ways of knitting in the round: Magic Loop, and Double Pointed Needles. Some use both techniques, and some are loyal to one or another. I am a sucker for magic loop, I find that overall my work goes more quickly, and there's a ton less "laddering" in the work. Laddering occurs when you're not knitting tight enough over the needle change offs and you get, as the name suggests, little ladders between your work.
In this post, I'll be covering working on double pointed needles. Double pointed needles are a bit "fiddly" at first, but don't let that scare you away, it always feels like that and it's totally normal. Once you get in a few rounds, it will start to feel a whole lot more stable.
Okay, here goes:
Let's pretend we have a pattern, and it calls to cast on 20 stitches. Grab your dpn's, and cast on 20 stitches to a needle.
Knitting in the round is definitely intimidating at first, but if you just follow along below, take breathers and make sure not to get ahead of yourself, or expect perfection on your first go at it, you'll be fine. :) I promise.
Now, there are two popular ways of knitting in the round: Magic Loop, and Double Pointed Needles. Some use both techniques, and some are loyal to one or another. I am a sucker for magic loop, I find that overall my work goes more quickly, and there's a ton less "laddering" in the work. Laddering occurs when you're not knitting tight enough over the needle change offs and you get, as the name suggests, little ladders between your work.
In this post, I'll be covering working on double pointed needles. Double pointed needles are a bit "fiddly" at first, but don't let that scare you away, it always feels like that and it's totally normal. Once you get in a few rounds, it will start to feel a whole lot more stable.
Okay, here goes:
Let's pretend we have a pattern, and it calls to cast on 20 stitches. Grab your dpn's, and cast on 20 stitches to a needle.
So now we've got 20 stitches on our needle. The set of dpn's I'm using is a set of four, some come in sets of four, others in five and so on. Do your best to distribute the stitches among the needles evenly, just slip them onto their respective needle as if to knit. I have 6 stitches on two needles, and 8 on the last.
As the picture shows, the tail end of the yarn, and the working end, are on the needle on the right. We're going to be working on the left hand needle. Where the working yarn leaves off indicates where you begin, laying the needles flat helps you find where they naturally fall more easily, which is the needle to left. To make sure you're not twisting stitches, you can align all the knots of the cast on edge in towards each other, if you look at the picture you'll see what I mean. When I start the first round, I pick up tail yarn and knit it into the first two stitches, for a snug connection. This is my preference, it's not necessary.
Just start working on that first row. It helps to just pretend that those other two needles don't even exist, you don't need them right now, just focus on the two in your hands. Once you complete that needle, just move to the next as you just did with the first needle, all the way around.
I place a marker on the last needle that completes the round, so the third. So I know, when I finish this work on this needle, I've completed a round.
As I mentioned earlier, some have problems with laddering. Laddering looks a little something like this:
This happens when your dpn's meet, and you're not knitting that stitch quite tight enough. This can be avoided a couple of ways:
1.) Make sure you're knitting the first stitch on each needle a little tighter than normal.
2.) You can switch where the stitches are, so that no two stitches are always the beginning stitch. You can do this by slipping stitches between needles. But this can be a pain in the bum. Usually just making sure you're giving the first stitch some special attention helps just fine. But with lace yarn, it may be best to move the stitch around. I find I have much more of a problem with laddering the finer the yarn I use.
And there you have it! You just keep working around like this, and you will get a tube. Knitting in the round is a wonderful skill to have. In a later post I'll be discussing Magic Loop, and even knitting with two circular needles.
Hope to see you there!
Having trouble? Need a video? Here's a great Youtube link:
And as always, if you have questions, shoot me an email, I'm here for you! ashley.mishmoshcrafting@gmail.com
Allonsy!
Sunday, April 8, 2012
Happy Easter!
I'm really on top of it this Easter, wishing ya'll a good holiday at midnight! At least, midnight for me. In celebration, I knit this little guy.
Pattern can be found here: http://www.rebeccadanger.typepad.com/dangercraftsbunnynuggetknittingpattern.pdf
I did it a wee bit different, in the fact that his ears weren't completed and sewn on, I picked up 4 stitches on each side of the head, rather than having to sew on twice.
My husband was being silly, or he was just really excited. :)
He even has a little puffy bunny tail.
Happy Easter! Hope you and your family have a splendid Sunday.
Thursday, March 22, 2012
Knitting Backwards
Knitting backwards can be a very handy skill to have. Personally, I don't use it for long rows of purling, because it can be a tad fiddly, as my left hand is nearly useless when it comes to skilled movements. But if you're naturally blessed with ambidexterity, well, it will be a lot easier, also - teach me your ways, please?
Knitting backwards, which is more correctly, purling backwards is the most useful for short rows, like when you're working the heel of a sock, or working entrelac. It can make an annoying process of constantly turning your work around way less of a pain in the keester.
Also, it's really easy. There's really no fancy footwork involved, you just have to get used to using your left needle, which is really fiddly at first, since we're all taught that our left needle stays stationary, a proverbial parking lots for our stitches.
If you do love knitting backwards, feel free to use it all the time! I just find that when working long groups, I have some stitches tight, some very loose.
Okay, here we go.
As you can see, I've already been playing with knitting backwards on this piece in a bunch of random short rows.
1. Your left needle goes into the back leg of the stitch.
2. Wrap your yarn counterclockwise around the front of the needle, so you'll be pulling the yarn from behind and around the needle to the right. (it's my natural instinct to go clockwise, this will work, but you will have a stitch that is seated the wrong way on your needle.)
3. Pull it through, removing the original stitch from your right needle.
It's really that easy.
Now, let's just say you make a mistake, you wrap the yarn clockwise for awhile before catching yourself, silly you. That's okay!
If you wrapped the yarn incorrectly, you will have a stitch that looks like this:
As you can see, the stitch is seated on our needle the wrong way, the left leg being in front, rather than behind. This can be corrected very easily on the next knit row by knitting into the "back loop" of this stitch, rather than into the front.
And there we have it, knitting backwards. It's a simple, and useful technique to utilize.
As always, if you have any questions, please feel free to email me at: ashley.mishmoshcrafting@gmail.com
Knitting backwards, which is more correctly, purling backwards is the most useful for short rows, like when you're working the heel of a sock, or working entrelac. It can make an annoying process of constantly turning your work around way less of a pain in the keester.
Also, it's really easy. There's really no fancy footwork involved, you just have to get used to using your left needle, which is really fiddly at first, since we're all taught that our left needle stays stationary, a proverbial parking lots for our stitches.
If you do love knitting backwards, feel free to use it all the time! I just find that when working long groups, I have some stitches tight, some very loose.
Okay, here we go.
As you can see, I've already been playing with knitting backwards on this piece in a bunch of random short rows.
1. Your left needle goes into the back leg of the stitch.
2. Wrap your yarn counterclockwise around the front of the needle, so you'll be pulling the yarn from behind and around the needle to the right. (it's my natural instinct to go clockwise, this will work, but you will have a stitch that is seated the wrong way on your needle.)
3. Pull it through, removing the original stitch from your right needle.
It's really that easy.
Now, let's just say you make a mistake, you wrap the yarn clockwise for awhile before catching yourself, silly you. That's okay!
If you wrapped the yarn incorrectly, you will have a stitch that looks like this:
As you can see, the stitch is seated on our needle the wrong way, the left leg being in front, rather than behind. This can be corrected very easily on the next knit row by knitting into the "back loop" of this stitch, rather than into the front.
And there we have it, knitting backwards. It's a simple, and useful technique to utilize.
As always, if you have any questions, please feel free to email me at: ashley.mishmoshcrafting@gmail.com
Wednesday, March 21, 2012
Entrelac: Parts 2.5 - 5
In our last post we left off on entrelac with our base triangles, and our left side triangle, and two left slanting central diamonds. Now we're going to pick up and knit a right side triangle, and two right slanting diamonds.
By the way, if you've gotten to this point, I'm willing to bet you're really starting to 'get' entrelac. Congrats :)
Part 3: Right Side Triangle
We're now going to have to pick up stitches in the right edge of the last base triangle. As usual, 8 of them.
Now this one gets a little confusing, because we're not going to touch those stitches past the marker in this picture, the live stitches for our central diamond. We're going to be decreasing the stitches we just picked up down to 1. Here we go:
1. Knit 7, slip the last stitch purlwise. Turn.
2. Purl to the last two stitches, purl these 2 together. Turn.
3. Knit 6, slip the last stitch. Turn.
4. Purl to the last two stitches, purl them together. Turn.
Continue working this way, until you have one remaining stitch, ending on a purl 2 together. This remaining stitch will serve as the first 'picked up stitch' in our next part.
Part 4: 3 (Left Slanting) Central Diamonds
As I said, the first stitch is the last remaining stitch from our left side triangle, this is for our first left slanting diamond only. The other two will be the regular 8.
1.Cut a nice little tail, and pick up your contrast color, and pick up 7 (2nd & 3rd diamond: 8) stitches in the edge.
2. Slip the last picked up stitch onto the left needle, and ssk (slip 1 knitwise, slip another one knitwise, and knit together.) This time we're using the ssk so that the green stitches lay over the blue, creating a clean edge for diamonds of the fabric.
3. Purl across, turn.
4. Slip 1, knit to the last stitch, ssk again. Turn.
Continue in this way until all the blue stitches are gone, and you will end, as usual, on the last ssk. From there you will be ready to repeat the above steps to pick up 8 more stitches, and complete two more left slanting diamonds, for 3 in total. Remember, in the next two diamonds you will be picking up 8 complete stitches, not 7 as before.
And there you have it! To continue after this, you will mosey back on over to my last post, Part 2: The Left Triangle working through up until this point, until you're reached your desired length.
Part 5: The Bind Off
Now, for the sake of a nice even piece of entrelac you want to bind off when you have this:
By the way, if you've gotten to this point, I'm willing to bet you're really starting to 'get' entrelac. Congrats :)
Part 3: Right Side Triangle
We're now going to have to pick up stitches in the right edge of the last base triangle. As usual, 8 of them.
Now this one gets a little confusing, because we're not going to touch those stitches past the marker in this picture, the live stitches for our central diamond. We're going to be decreasing the stitches we just picked up down to 1. Here we go:
1. Knit 7, slip the last stitch purlwise. Turn.
2. Purl to the last two stitches, purl these 2 together. Turn.
3. Knit 6, slip the last stitch. Turn.
4. Purl to the last two stitches, purl them together. Turn.
Continue working this way, until you have one remaining stitch, ending on a purl 2 together. This remaining stitch will serve as the first 'picked up stitch' in our next part.
Part 4: 3 (Left Slanting) Central Diamonds
As I said, the first stitch is the last remaining stitch from our left side triangle, this is for our first left slanting diamond only. The other two will be the regular 8.
1.Cut a nice little tail, and pick up your contrast color, and pick up 7 (2nd & 3rd diamond: 8) stitches in the edge.
2. Slip the last picked up stitch onto the left needle, and ssk (slip 1 knitwise, slip another one knitwise, and knit together.) This time we're using the ssk so that the green stitches lay over the blue, creating a clean edge for diamonds of the fabric.
4. Slip 1, knit to the last stitch, ssk again. Turn.
Continue in this way until all the blue stitches are gone, and you will end, as usual, on the last ssk. From there you will be ready to repeat the above steps to pick up 8 more stitches, and complete two more left slanting diamonds, for 3 in total. Remember, in the next two diamonds you will be picking up 8 complete stitches, not 7 as before.
And there you have it! To continue after this, you will mosey back on over to my last post, Part 2: The Left Triangle working through up until this point, until you're reached your desired length.
Part 5: The Bind Off
Now, for the sake of a nice even piece of entrelac you want to bind off when you have this:
As you can see, we have a left side triangle, 2 right slanting diamonds, and a right side triangle. Now you're ready to begin binding off.
1.Just as before, the last stitch on the right side triangle will serve as the first picked up stitch. Pick up 7 stitches on the inside of the right side triangle. As above slip the last stitch of the picked up stitches on to your left hand needle, ssk. (Slip slip knit)
2.Purl Across.
3. K2tog, knit to last stitch, ssk.
4. Purl Across.
5. K2tog, knit to last stitch, ssk.
We're working to decrease one green stitch, and one blue stitch, in the same row, and just purling on the reverse.
You will do this until you have two green stitches, and one blue stitch. From here you will slip the first stitch, ssk the last green and blue stitch together, and then pass your first slipped stitch over the stitch you just ssk'ed.
So: Slip 1, ssk, psso (pass slipped stitch over)
You will have one stitch on your needle, this will be the first stitch of your picked up stitches. So you will again pick up 7 stitches, and follow the directions above two more times. Every time you will have one stitch left on the needle. On the last one, cut yarn and pull through.
And, by dern, you did it! See, I told you, it isn't that hard. If you have any problems, any questions at all, please feel free to email me at: ashley.mishmoshcrafting@gmail.com
Now, go brag about yourself to your friends and loved ones.
Subscribe to:
Posts (Atom)